Histories
To trend data points from devices and sensors, including droplets, Modbus, and LoRaWAN® devices, follow these steps:
Add a Host: Begin by adding host which serves as the central management point for your networked devices and sensors.
Add a Network: Setup a network. This serves as the overarching framework for connecting and managing your devices and sensors.
Add a Device: Once the network is set up, add the specific device from which you want to collect data. This could be a droplet, Modbus device, LoRaWAN® device, or any other compatible device.
Add a Point: After adding the device, proceed to add the individual data points that you wish to trend or monitor. These points represent the specific measurements or values you want to track, such as temperature, pressure, or humidity.
Once you've completed these steps and have points added, you can begin trending the data by accessing the histories or logging functionality. This allows you to visualise and analyse the historical data trends from your devices and sensors over time.
Enabling History
To enable trending for specific points under the Drivers section, follow these steps:
First, enable
Historyon Host Level by right-click the host -> edit and checked theHistory Enable.Navigate to the
Driverssection, right-click the network where the point you want to trend is located. Click on theeditbutton.In the editing interface, check the
History Enablecheckbox.Click save.
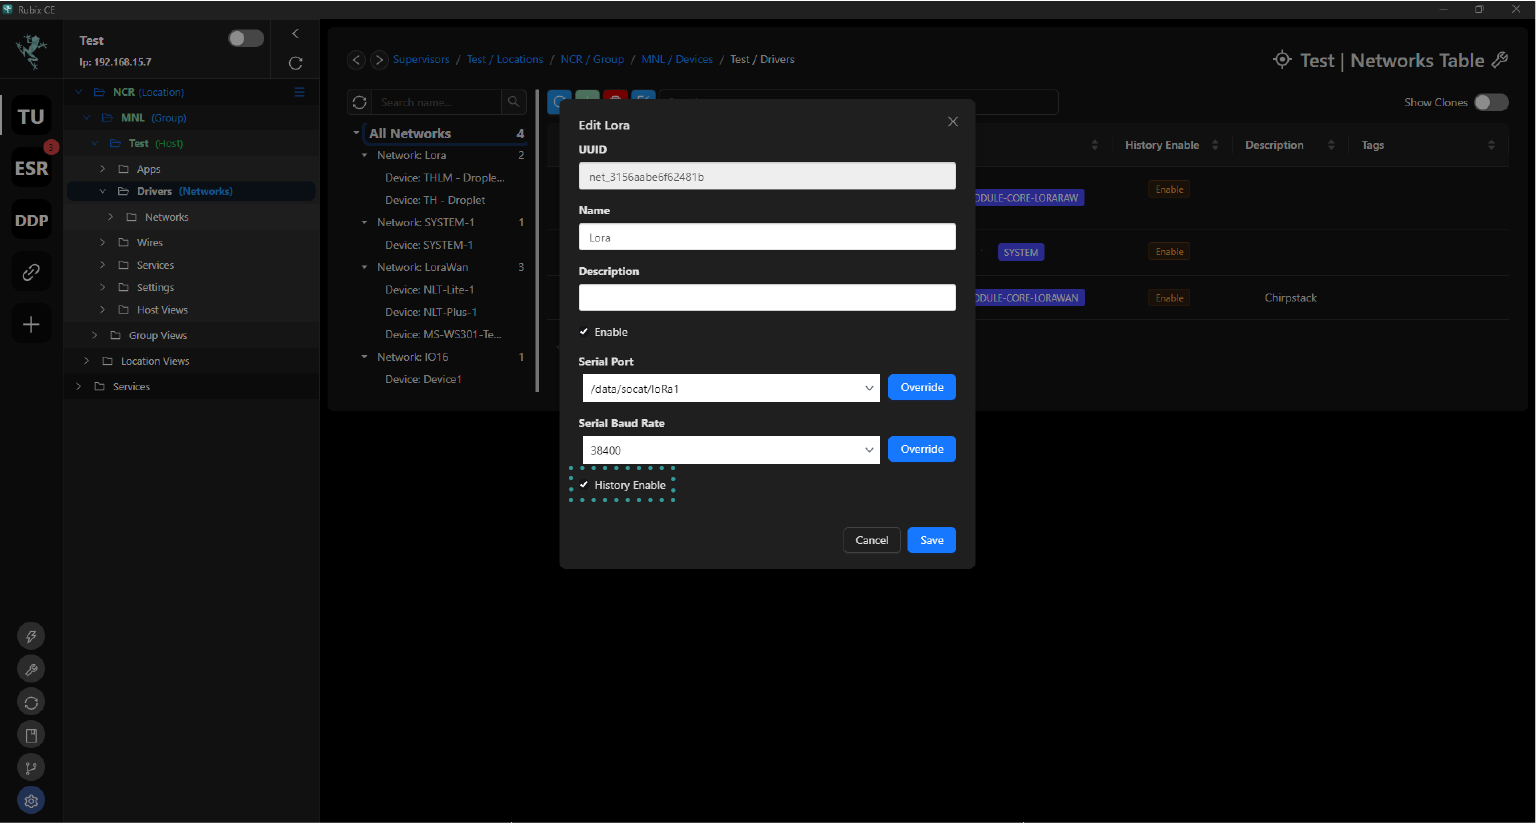
Do the same steps 2-3 above, this time instead of network, do this on the device.
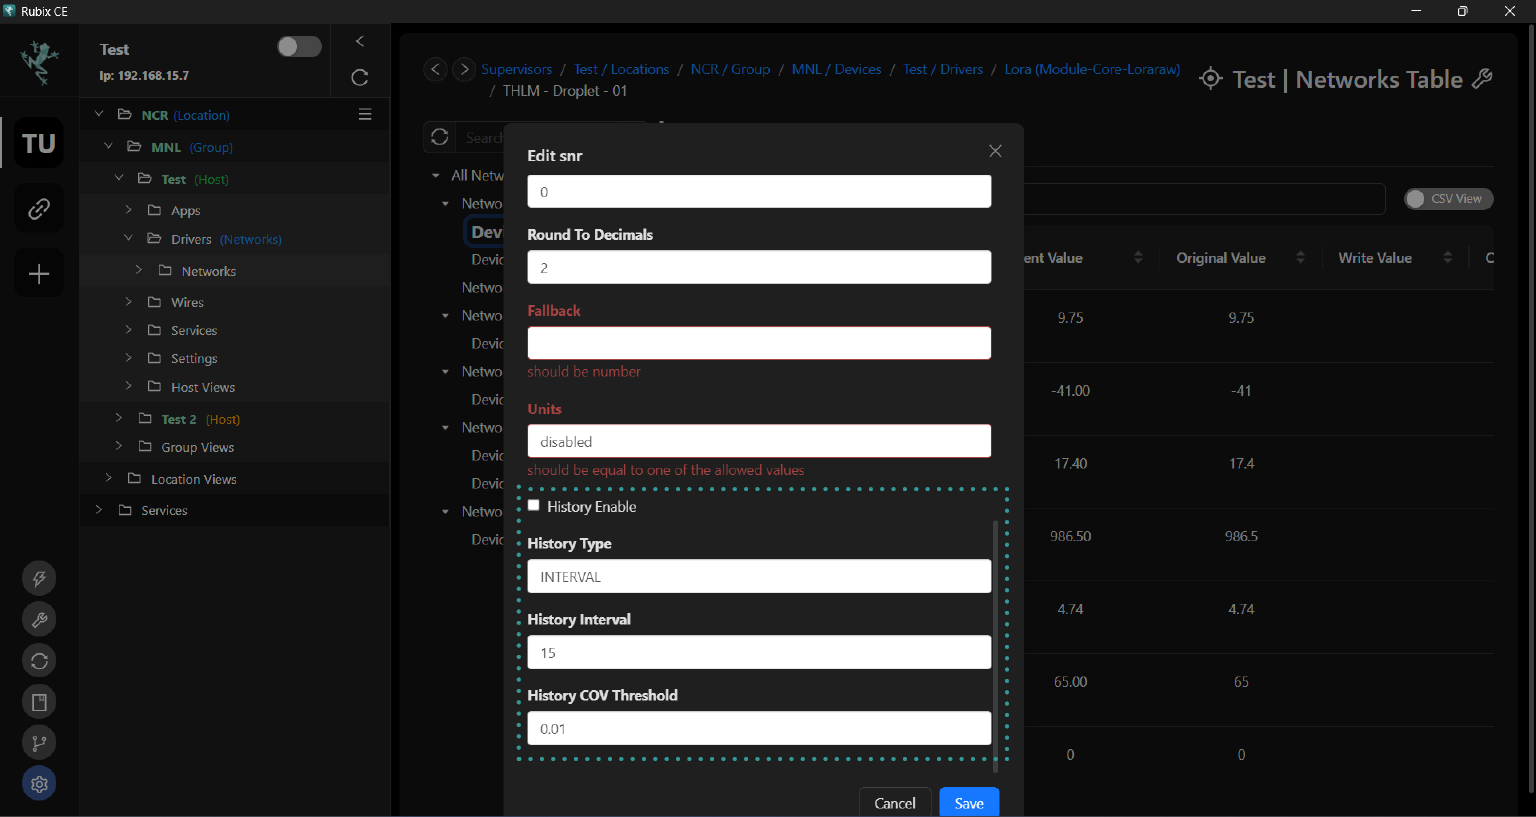
Open the device, select the point you wish to trend, right click then edit. Enable history for the point and save the changes.
By checking these options, you ensure that the selected points will be included in the historical data logging process and are ready for trending and analysis within Rubix CE.
History Type and History Interval
COV (Change of value): Select this option if you want to trend data only when the point's value has changed. This helps in capturing data trends efficiently, especially when there are significant changes in the values.
- Example: You have a temperature sensor that reports values every minute. If the temperature remains constant at 25°C for several hours and then suddenly changes to 30°C, the system will record a data point at the moment of change (25°C to 30°C).
COV and Interval: Choose this option if you want to trend data at every set interval and also when the point's value changes. This provides a comprehensive view of data trends, capturing both regular updates and significant changes.
- Example: Using the same temperature sensor example, if you set an interval of 30 minutes and the temperature changes from 25°C to 30°C during that interval, the system will record data points at both the regular 30-minute interval and at the moment of change (25°C to 30°C).
History Interval: This setting determines how often the history trends occur.
- Example: If you set the History Interval to 1 hour for a humidity sensor, the system will record data points every hour, regardless of whether the humidity value has changed or remained the same.
If you've selected Interval or COV and Interval for the History Type, specify the desired interval for trending data. For example, if you set the History Interval to 1 hour, data will be trended every hour.
Scenario Example:
Scenario: You are monitoring a water tank's level using a sensor that reports data every 5 minutes. You want to trend this data to understand usage patterns.
COV: You select COV for the tank level sensor. Throughout the day, the water level remains stable at 50%, but suddenly drops to 30% after someone uses water. The system records data at the moment of change, capturing the drop from 50% to 30%.
COV and Interval: You choose COV and Interval, with an interval set to 30 minutes. The system records data points every 30 minutes and also captures changes in the tank level whenever they occur, ensuring both regular updates and significant changes are logged.
History Interval: If you set the History Interval to 1 hour for the tank level sensor, the system records data points every hour regardless of whether there is a change in the tank level. This provides regular updates on the water level every hour.
Viewing Histories
From the services/histories Tab: You can access history data from the services/histories tab. This tab provides a centralized location for viewing and managing historical data from multiple points or devices within your environment. It offers a comprehensive overview of historical trends and allows for easy navigation and analysis of past data records.
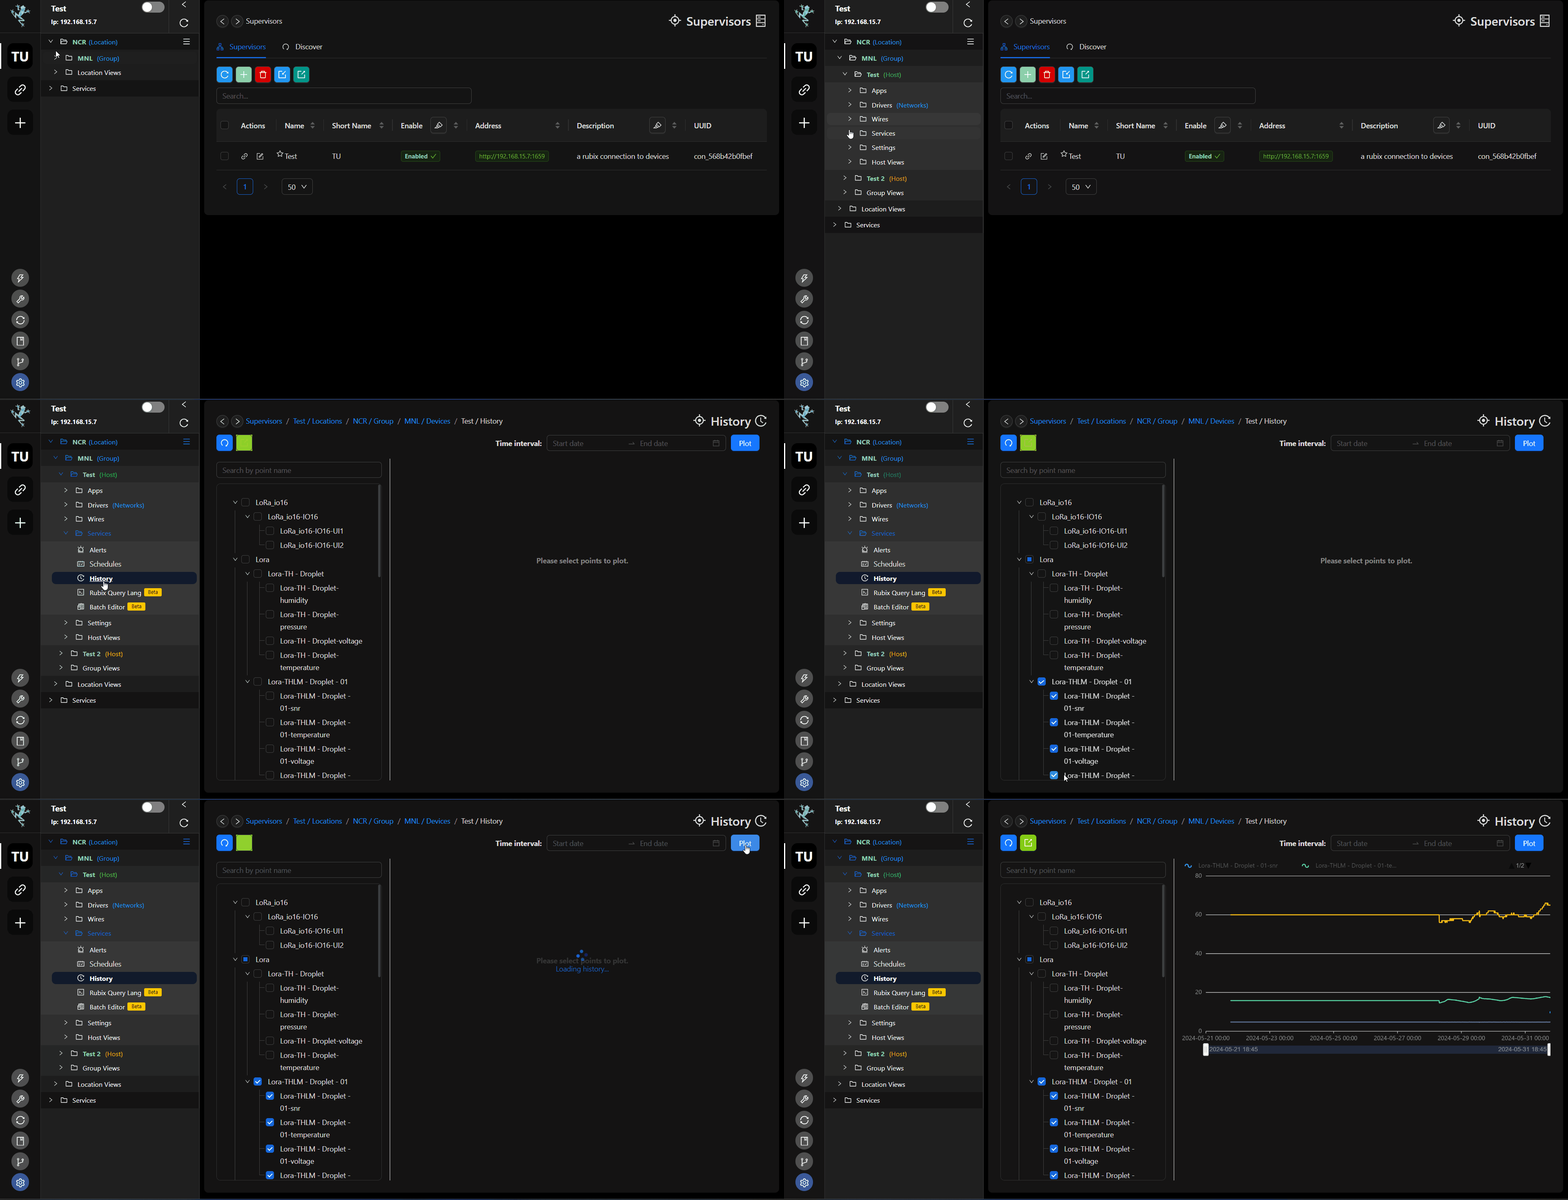
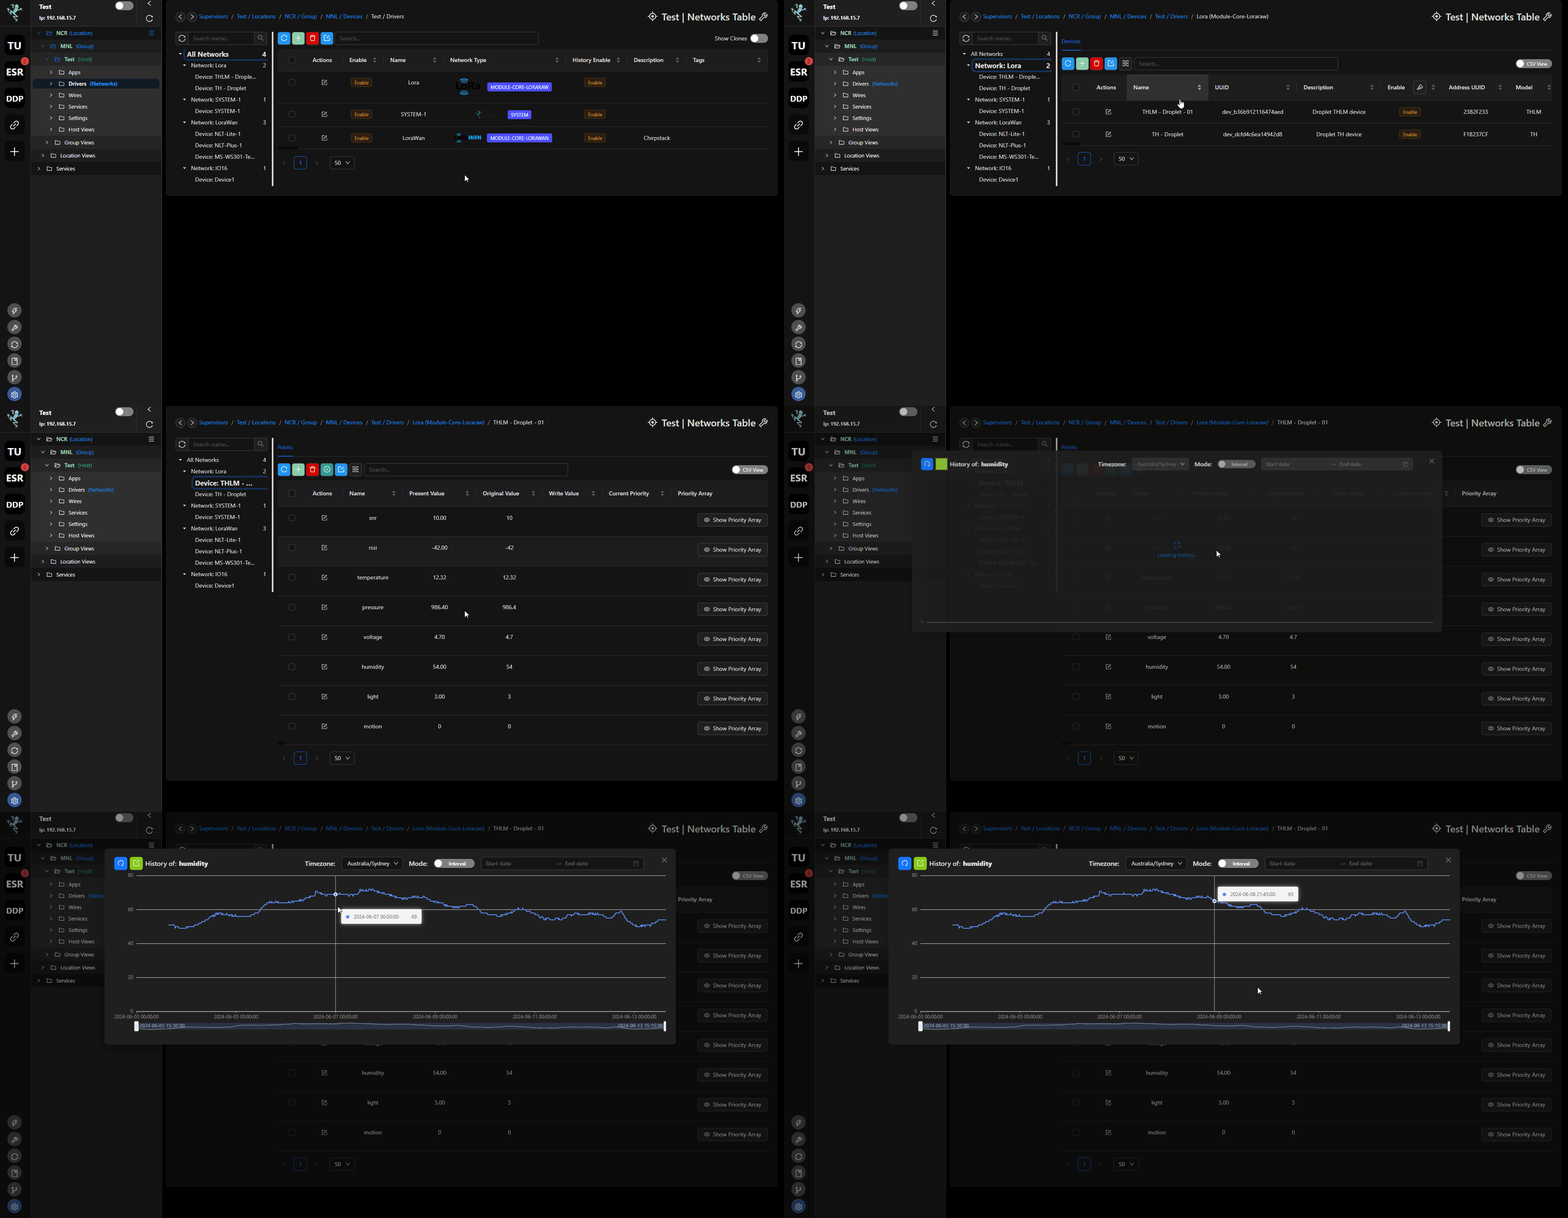
Direct from point: You also has an option to view the history data from the point itself.
Exporting Histories
You can export histories in .xlsx format by following these steps:
- Select the point/(s) for which you want to export history.
- Adjust the start and end date/time for the history.
- Click the export button
.
- Name the history file according to your preference, but it's recommended to include the date for easy identification.
- Choose the folder where you want to save the data.
- Click Export to complete the process.
