Supervisor
The Rubix Platform CE (Computer Edition) application enables the setup and programming of multiple instances of Rubix OS. Each customer has their own instance of Rubix OS, which can be running either in the cloud or on-premises. This setup allows users of Rubix CE to engineer multiple sites or devices simultaneously.
Administrators have the ability to generate multiple tokens for each site-specific customer. Additionally, they can revoke access for a specific customer from a site by revoking the corresponding token. For detailed instructions, please refer to the section on 'Generating a Token'.
- Nube iO Cloud Account.
- And/Or Nube iO Rubix Compute.
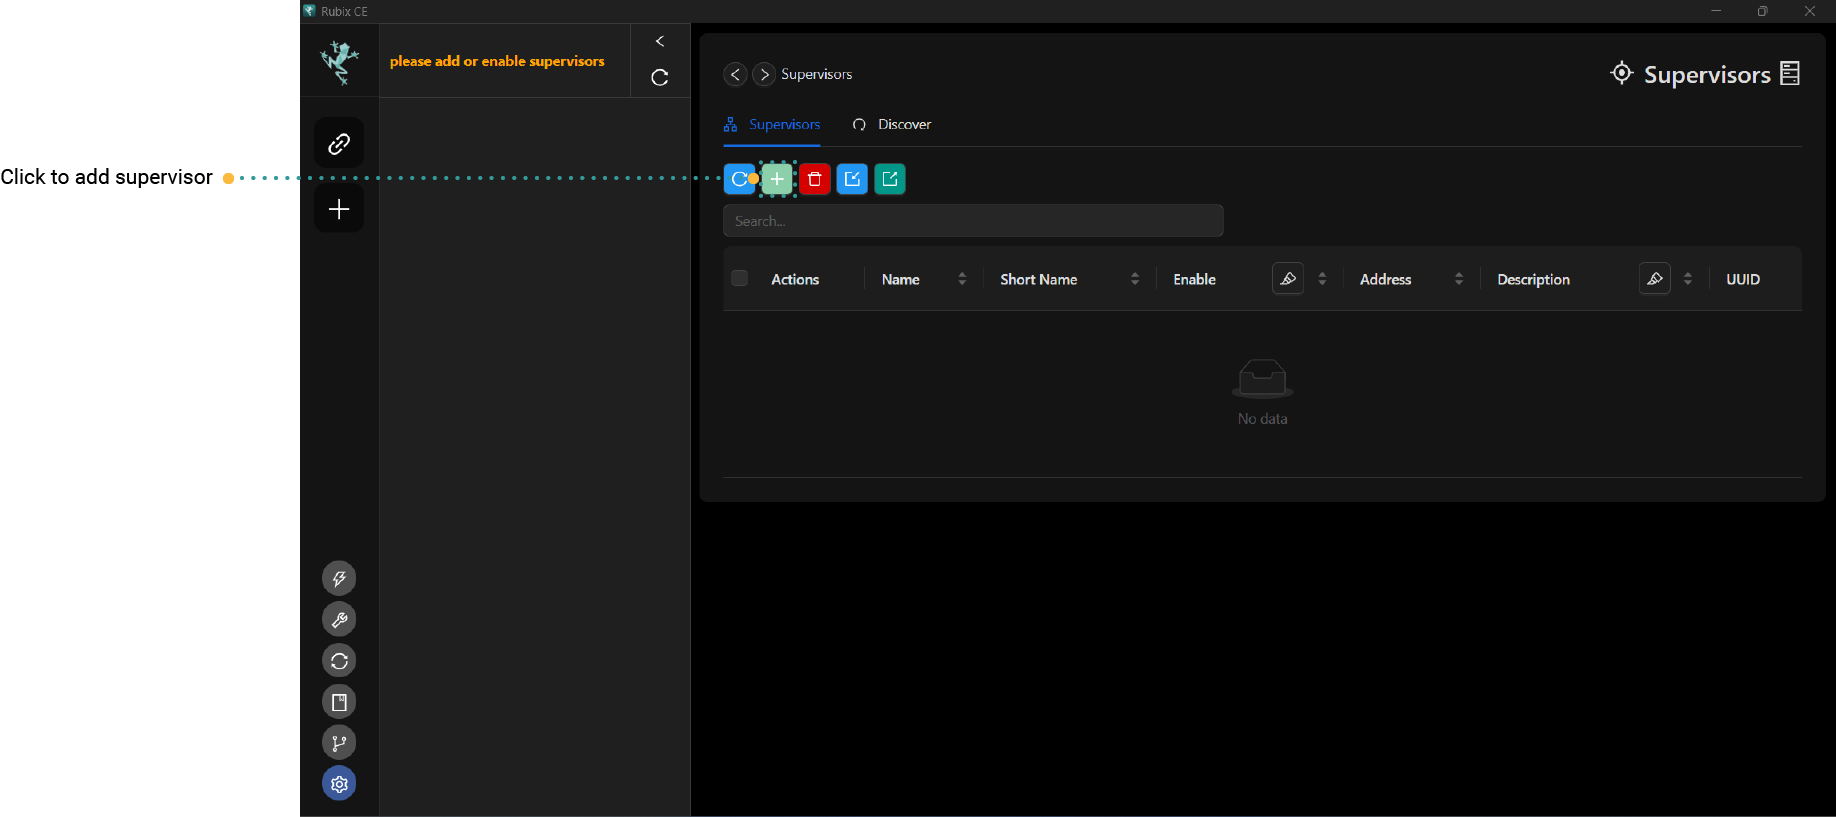
Adding a Supervisor
- Open the Supervisor page.
- Click on the Add
 .
.
ETH 1: 192.168.15.10
ETH 2: AUTO DHCP
For the default username and password, please contact Nube iO support at support@nube-io.com.
- Add Supervisor Hosting Option
Supervisor Hosting Option
A supervisor can either be a Rubix Compute or Rubix OS running in the cloud. A Supervisor serves as the entry point to the functionalities and navigation of Rubix OS. The supervisor's function is to host and manage all Host devices, e.g Rubix Computes.
Option 1: Nube iO Device
- This option requires a Rubix Compute.
- It is the simplest method to commence with Nube iO products.
Option 2: Nube iO Cloud
- This option necessitates both a Rubix Compute and a Nube iO Cloud Account.
- Please contact
nube-io supportat support@nube-io.com for access to a Nube iO Cloud Account.
Option 3: Personal Computer via Device Simulation
- No hardware is needed for testing this option.
- Install docker on your local PC.
This option is for advanced use only. Please refer to the setup of docker guide.
Insert the IP or web address of the Nube iO device/cloud you wish to connect.
When opting for Nube iO device hosting, you have the flexibility to select your preferred port for connection and specify whether it should use HTTPS or HTTP. The default port is set at 1659. Click
NextAdd a Supervisor Name.
Add the Supervisor sidebar icon name, which will be displayed in the menu
sidebar. It should consist of a maximum of four characters.The Supervisor description is optional. Feel free to provide a brief description of the Supervisor as needed.
Advanced options are also optional. Below are the descriptions for each:
Supervisor Sidebar Icon Color: Define the background color for the Supervisor icon in the sidebar.
Supervisor Group Name: Assign a group name to supervisors. Leave empty to remove a supervisor from a group. Supervisors with the same group name will be grouped together.
Supervisor Latitude: Specify the latitude for a supervisor.
Supervisor Longitude: Specify the longitude for a supervisor.
Ping Supervisor to check the connection to the newly added supervisor. You may opt to skip the process.
To configure the Rubix User token, you can generate it by logging in with your
usernameandpassword. If you haven't been provided with login details or a token, please reach out to support@nube-io.com for assistance. If you want to install a new Rubix OS version on your supervisor, clickSave Token & Next. Otherwise, clickSave & Quit.From the dropdown menu, select your preferred Rubix OS version. To install the new version, click
Install & Quit; otherwise, clickQuitto keep the current installation. Short clip below will guide you through the configuration.
Updating Rubix OS at Supervisor Level
If step #12 regarding adding the Supervisor was missed and you need to update your current Rubix OS, follow these steps:
- Navigate to the icon on the sidebar corresponding to the Supervisor whose Rubix OS you want to update.
- Right click the icon and choose
Update Rubix OS. - From the dropdown menu, select the desired OS version you wish to install.
- Click on the "Install" button and patiently wait until the installation process is complete.
- Once installation is finished, click on "Done".
Once the Supervisor is created it is automatically enabled. right-click the supervisor's name to Enable Supervisor or Disable Supervisor.
EnableSupervisor will display it on thesidebar.DisableSupervisor remove it from thesidebar.
Supervisor Setup in Rubix CE
The Supervisor in Rubix CE allows users to manage and program multiple instances of Rubix OS, whether cloud-based or on-premises. This enables efficient engineering and deployment across multiple sites or devices.