Modules
Overview
Modules serve as a means to extend the functionality of Rubix-OS. Instead of overcrowding Rubix Compute with every feature or protocol, users have the flexibility to add or remove modules based on their specific needs. This modular approach allows for a more tailored and efficient use of resources, enabling users to customize their Rubix CE experience according to their requirements.
The Rubix CE platform supports several key features:
- Reading point values from sensors and logical sources.
- Writing to points, with support for priority arrays.
- Creating and managing time schedules.
- Performing mass control operations, such as bulk updates of time schedules using Command Groups.
- Updating the gateway app's functionalities.
These features provide users with robust capabilities for managing and controlling their systems effectively.
List of Commonly Used Modules/Plugins
| Name | Is a Protocol | Supports Networks | Description | Use Case |
|---|---|---|---|---|
| System | Yes (RestApi) | Yes | Acts as a generic proxy for networks/devices/points not related to any protocol | Useful for managing schedules and proxy points |
| Lora® | Yes (LoRa®) | Yes | Used with Nube iO LoRa® sensors | Ideal for implementing wireless sensor networks |
| LoRaWAN® | Yes (LoRaWAN®) | Yes | Compatible with various LoRaWAN® sensors | Suitable for integrating LoRaWAN® sensors |
| BACnet master | Yes (BACnet) | Yes | Facilitates read/write operations with BACnet devices | Essential for acting as a BACnet master |
| Modbus | Yes (Modbus) | Yes | Enables read/write operations with Modbus devices, supports RS485 or Modbus TCP | Essential for functioning as a Modbus master |
| History | No | No | Provides internal service for storing point histories | Useful for accessing historical data locally or in the cloud |
| Postgres | No | No | Sends data to PostgreSQL (requires history plugin for use) | Useful for edge-to-cloud historical data storage |
These protocols offer various functionalities catering to different use cases, from managing schedules to integrating wireless sensors and handling industrial protocols like BACnet and Modbus.
Install A Module
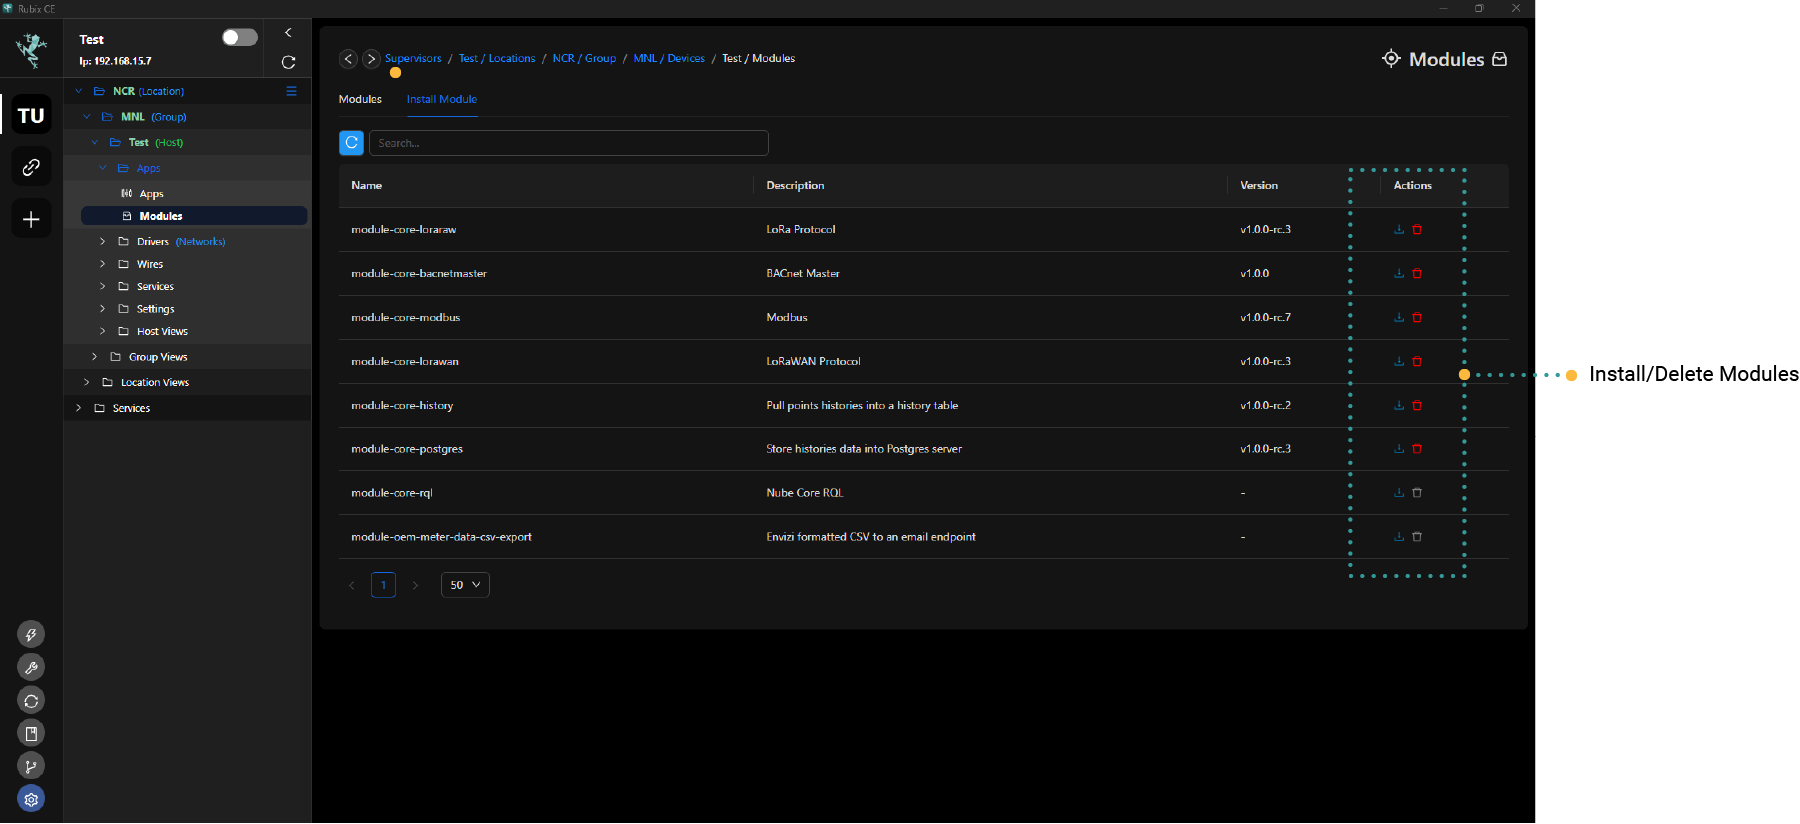
To install a module in Rubix-CE, follow these steps:
- Access the Module page by expanding
Appsand then selectingModule. - Click on the
Install Moduletab. - Check the list of available modules and click the install button

- A pop-up window will appear prompting you with a drop down menu for module version.
- Select module version and click install. Wait for the installation to finish, which may take a few minutes.
- After the download is complete, Rubix-CE will prompt you to restart the software.
Uninstalling Modules in Rubix-CE
- Navigate to the module page.
- Click on the
Install Moduletab. - Click the delete button
 to uninstall the plug-in.
 - A pop-up window will appear prompting you for confirmation. Click
OK.
Uninstalling a module that was previously installed will not delete the network associated with that plugin. The uninstallation process only removes the module and its functionalities from Rubix-CE, but it does not affect any networks or configurations that were established while the module was in use.
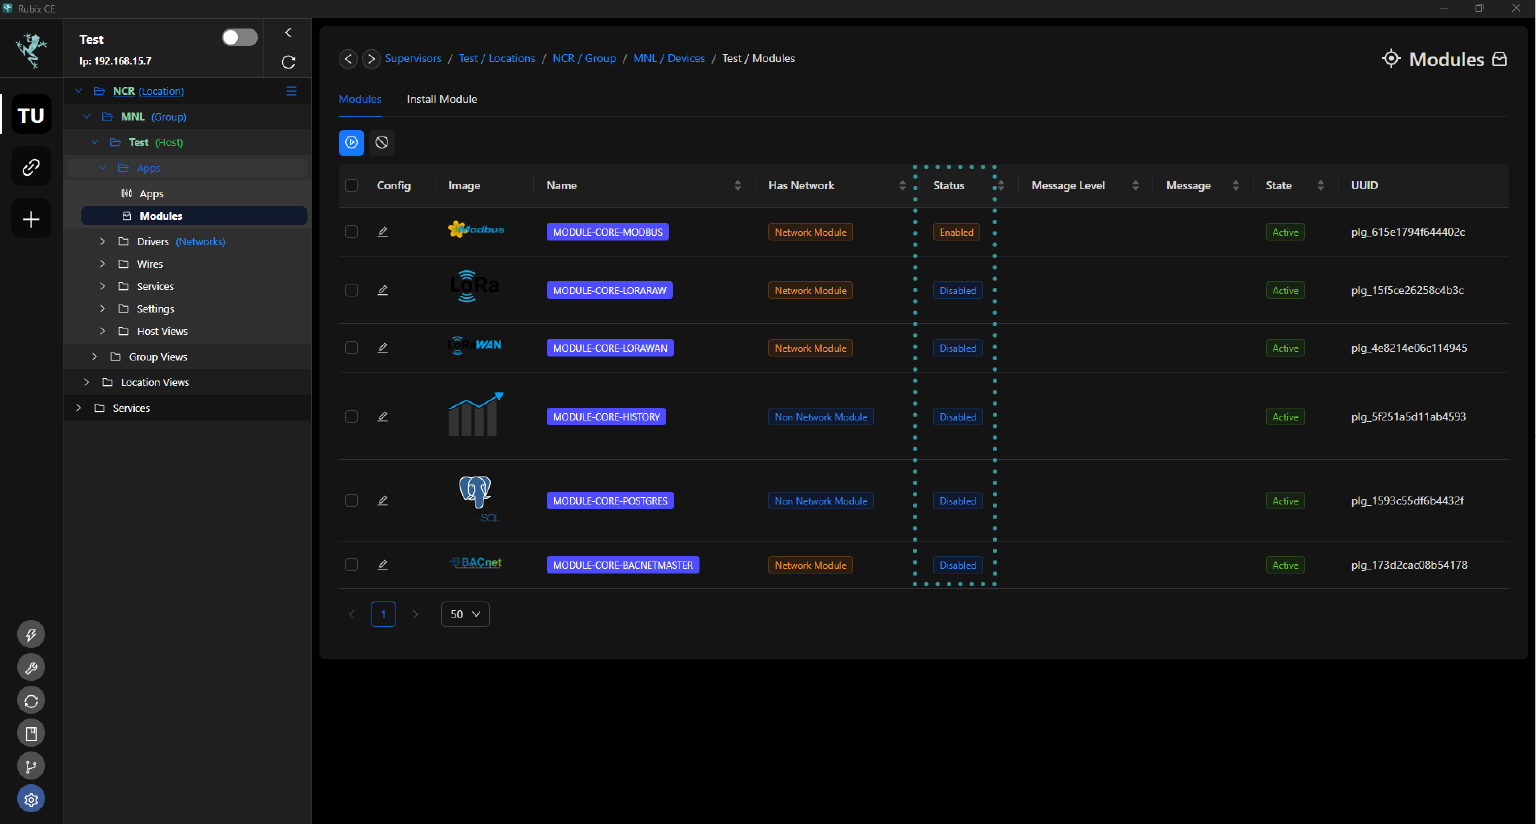
Enable & Disable Module
If a module isn't enabled, you may encounter errors when attempting to add or utilize its functionalities within Rubix-CE. To avoid such errors, ensure that the module is enabled before attempting to use it.
- Navigate to the
Modules - Right-click the module you want to configure.
- Click enable or disable from the Menu as needed.